
Hello Crafty Friends!
Thank you for visiting this past weekend during the Christmas in July Hop. Each day I created a different card, but I did not have the opportunity to explain how to make a shaker card from Day 3. I now have pictures and instructions to show you how I made this card.
First, you will need to purchase the Shake It card pouches. I bought mine at the local scrapbooking store. There are 10 in a package and they do come in various shapes and sizes. Here is the link to find out more...Impression-Obsession.


Next, I used the Wild Card cartridge to cut my card base from a solid colored piece of cardstock at 4 3/4". I selected the "stitched card" on p. 35. My small pouch fits perfectly. If you do not own the cartridge, you can make your own window with a square punch or you can purchase the overlays with the shaker pouches.

Now, peal the sticker from the self-adhesive shaker window pouch and align over the cut-out square. Press on the edges around the window to make sure the two pieces are sticking together firmly.
Once the window pouch is set, you can add the front liner and frame. Be sure to save the square piece of paper from the liner. You will use this to seal in the glitter. I used the Wild Card cartridge to cut both these pieces at 4 3/4".


You are ready to begin the next step.

- First, you will need to find an image or digi (approximately 1" in size) for your window. Be sure to adhere the picture well or the glitter will stick to the edges. I used Doodlecharms to cut a gift (p. 109) at 1 1/2".
- Next, pour a small amount of glitter into the window as it is laying on a flat surface. I am using red shaped glitter that I purchased at Michaels on clearance for my window.
- Then, adhere the square window piece to the inside left flap. I used a glue pen and carefully went around the edges of the square. It will align over the square nicely.


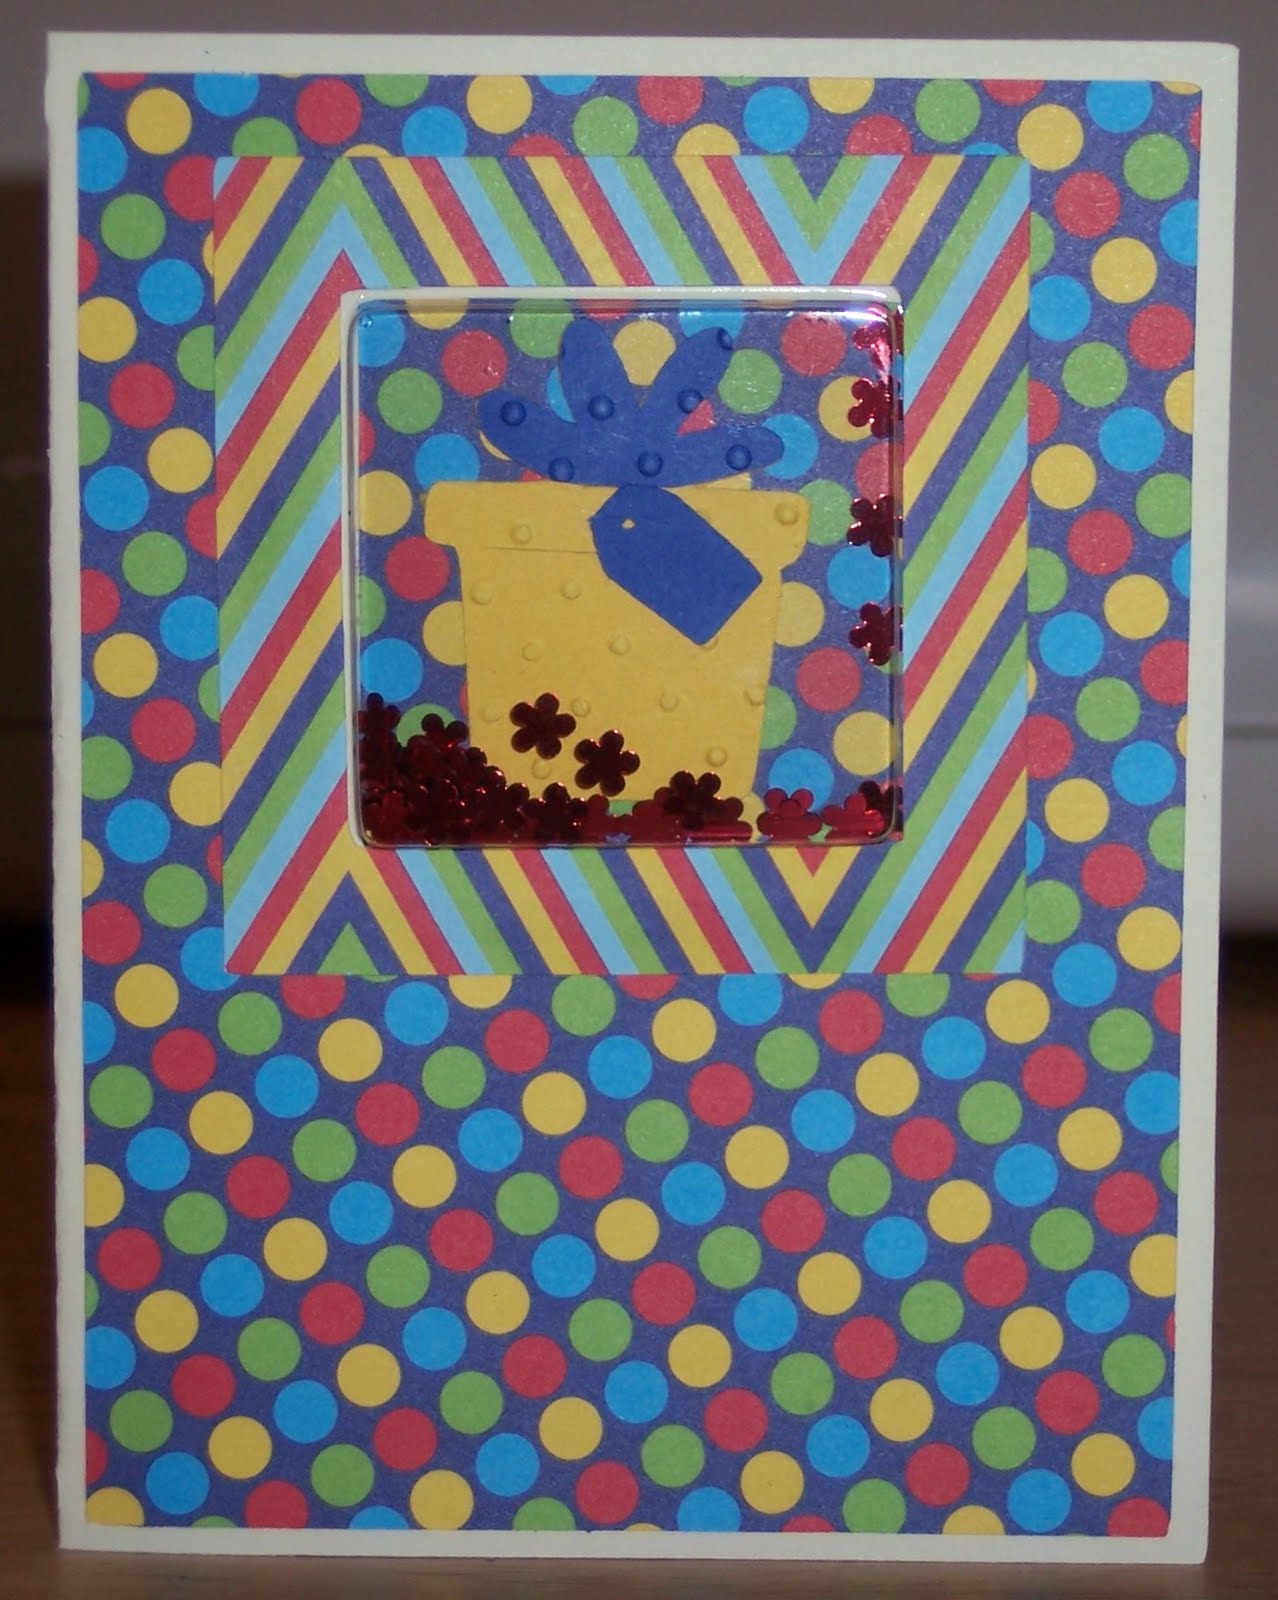
Here is what your card will look like from the front.

To create the inside liner, choose you paper and cut it slightly smaller than the card base to create a framed look.

Decorate and add your message. : )

I still need to add my sentiment and a few more cuts, but now you have instructions on how to make a shaker card. I think any child will enjoy receiving one. It will be like magic trying to figure out how the glitter got on the inside since you can't see the small piece hidden behind the liner. Good luck making one!
Christmas in July Blog Hop Winner:
Mr. Random helped me pick the winner.
I'd love to see a tutorial! I love making shaker cards but I haven't done one in a while.
TFS! Hugs, Cheryl
TFS! Hugs, Cheryl

Be sure to come back tomorrow for the Die Cuttin' Diva's newest challenge. We have another great sponsor for this week. Oh, how I wish I could enter and win!
Stay Creative,
Georgiana
Thanks for sharing the directions Georgiana... someday I hope to make one...
ReplyDeleteTFS, nice card. I love pictorial's so much easier to follow. Great job.
ReplyDeleteHugs,
Melissa D
mkds312@hotmail.com
sleeplesswonder.blogspot.com
Thanks for sharing this..I might have to go find me some of those shakers. I bet my niece would get a kick out of a card that had glitter you could shake on it. Do you know if you can get them at Hobby Lobby or the other stores like M's or J's?? I have several scrapbook stores near me I'll check there also.
ReplyDeleteHugs, Sheena
thanks for posting this you made it look so easy
ReplyDeleteThis is awesome! Thanks so much for the tutorial....another project on my to try list :)
ReplyDeleteWOWZERS! I love this shaker card! It looks great for birthdays, but I can see lots of winter snowflakes in one too. :) Great job!
ReplyDeleteThanks for the great tutorial! Great card and information :)
ReplyDeleteGreat shaker card, Georgiana, and great tutorial!!! TFS!!!
ReplyDeletei just loved your card and thank u so much for the tutorial,it has inspired me to try one out but have to improvise on the materials as will not be able to get the shaker window here in india.
ReplyDeleteThank you so much Georgiana for sharing!! The information you provided is awesome! I need to get busy and make a shaker card...I just love the effect!
ReplyDeleteHugs,
Diana
daisylovecreations.blogspot.com
Thanks for the tutorial Georgiana. I think packaging from some of our favorite products would be good too. I recently purchased some stick pins in a "bubble pac" like this. Could use those as well. Congrats to Chery G. on the win....
ReplyDeletegreat shaker card. congrats cg
ReplyDeleteWOW!! How did I miss this! Great tutorial! I just made a shaker card yesterday... this would have come in handy then! :)
ReplyDeleteThanks so much Georgiana!
hugs, Cheryl