Pages

Showing posts with label pictorial. Show all posts

Monday, July 2, 2012

Give Me Freedom and Bunched Ribbon Technique

Hello Crafty Friends,

There is a new challenge that you may enter beginning today. It is over at Exploring Cricut and it is perfect for this time of year.

The Challenge...4th of July
Red, White, and Blue

Here is my Design Team project...
I made this card for my son who has been at college for one week. Although he keeps in touch with me everyday, I am sure he is enjoying his freedom.

Materials:
blue glitter paper
blue gigham paper by Making Memories
red swirl paper by Bo Bunny
Independence Day Cricut cartridge ~ badge cut at 3" - 1 3/4"
Celebrations Cricut cartridge ~ stars (p110) cut at 1"
blue crinkle ribbon

Check Out This Technique...
Sandy from Ukiah asked how I made my crinkle ribbon looked bunched and how did it stay that way. I created a pictorial to show you the steps I take. I have tried other ways, but this way NEVER fails. The ribbon sticks every time!
First tape one end of the ribbon to the back of the card stock.
Flip over the cardstock and make sure you have some extra strong adhesive. I use these micro squares that I purchased from Oh My Crafts. They are the only adhesives that I found that work so well.
Place a square adhesive on the bottom side of the ribbon and press down. Then add another adhesive square. Carefully overlap a small section of the ribbon and gently press down.
Continue this same process until you get to the end. You can keep your ribbon in a straight line or curve.
Once you reach the other end, cut off any excess fabric and tape the ribbon to the back.
You are done!
I added two bows on each end to make it look festive. My son will not mind. He knows to keep mom happy.

I hope you understood my bunched ribbon pictorial and give this technique a try. If you have any questions, please ask! You may leave a message here or send me an e-mail (coachfans at cox dot net).

Can't wait to hear that you added some bunched ribbon.

Stay Creative,
Georgiana

Saturday, January 28, 2012

Making Stick Pins with Beads Pictorial

Have you seen all those fabulous pins attached on cards and layouts? What about the challenges that require pins to be included? Are you wondering how to make them?

Today, I would like to share a few tips to help you get started.
First, you will need to purchase a variety of beads. I would start with a couple bags to see if you will like working with pins/beads. Then remember, more beads you have the more combinations you will be able to create. I always get mine from Hobby Lobby when they have them 50% off. 

Our beads (my daughter and I share) are separated by color theme for the most part. It makes it easier to choose the colors to match the project.
Next, decide on a color pattern. With Valentine's Day approaching quickly, I will be working with silver, white and red
I chose some beads and now will layer them on a stick pin. The pins can be purchased at any craft store or Walmart. Remember to put the bead you want on the top first and work your way down. Do not add beads to the end of your pin. You will need room to attach the pins to your project (I like to attach mine into the bow.).
After I create the pattern I place the stick pins in a holder, so they can be glued. I have this small ribbon spool that is the perfect size. I prefer not to use my good pin cushion because I do not want to get Mod Podge on it.
I use an old paint brush to apply the Mod Podge. My husband asked why I had such a horrible looking brush (I think he wanted to throw it away and get me a new one.) and I had to explain it is just for glue. Be sure to apply glue to the top of the stick pin and in-between each bead. I then push down firmly so the beads will adhere to one another.
Don't forget to wash your brush while the pins are drying. Be sure to save this "glue" brush to make more pins!

Almost dry after 20 minutes...I did use a lot of Mod Podge!
Now they are done!
After they are completely dried, I wiggle them free carefully and transfer them to my pin cushion until they are ready to be used.
Don't forget about my pin giveaway.
The deadline is January 29th and the winner  will be announced on Monday, January 30th.

Have fun making some of your own. The possibilities are endless with all the colors, shapes and sizes of beads that are available. Please come back and share what you made. I would love to see them.

Stay Creative,
Georgiana

Monday, July 18, 2011

Shaker Card Pictorial **Winner Added**

Hello Crafty Friends!
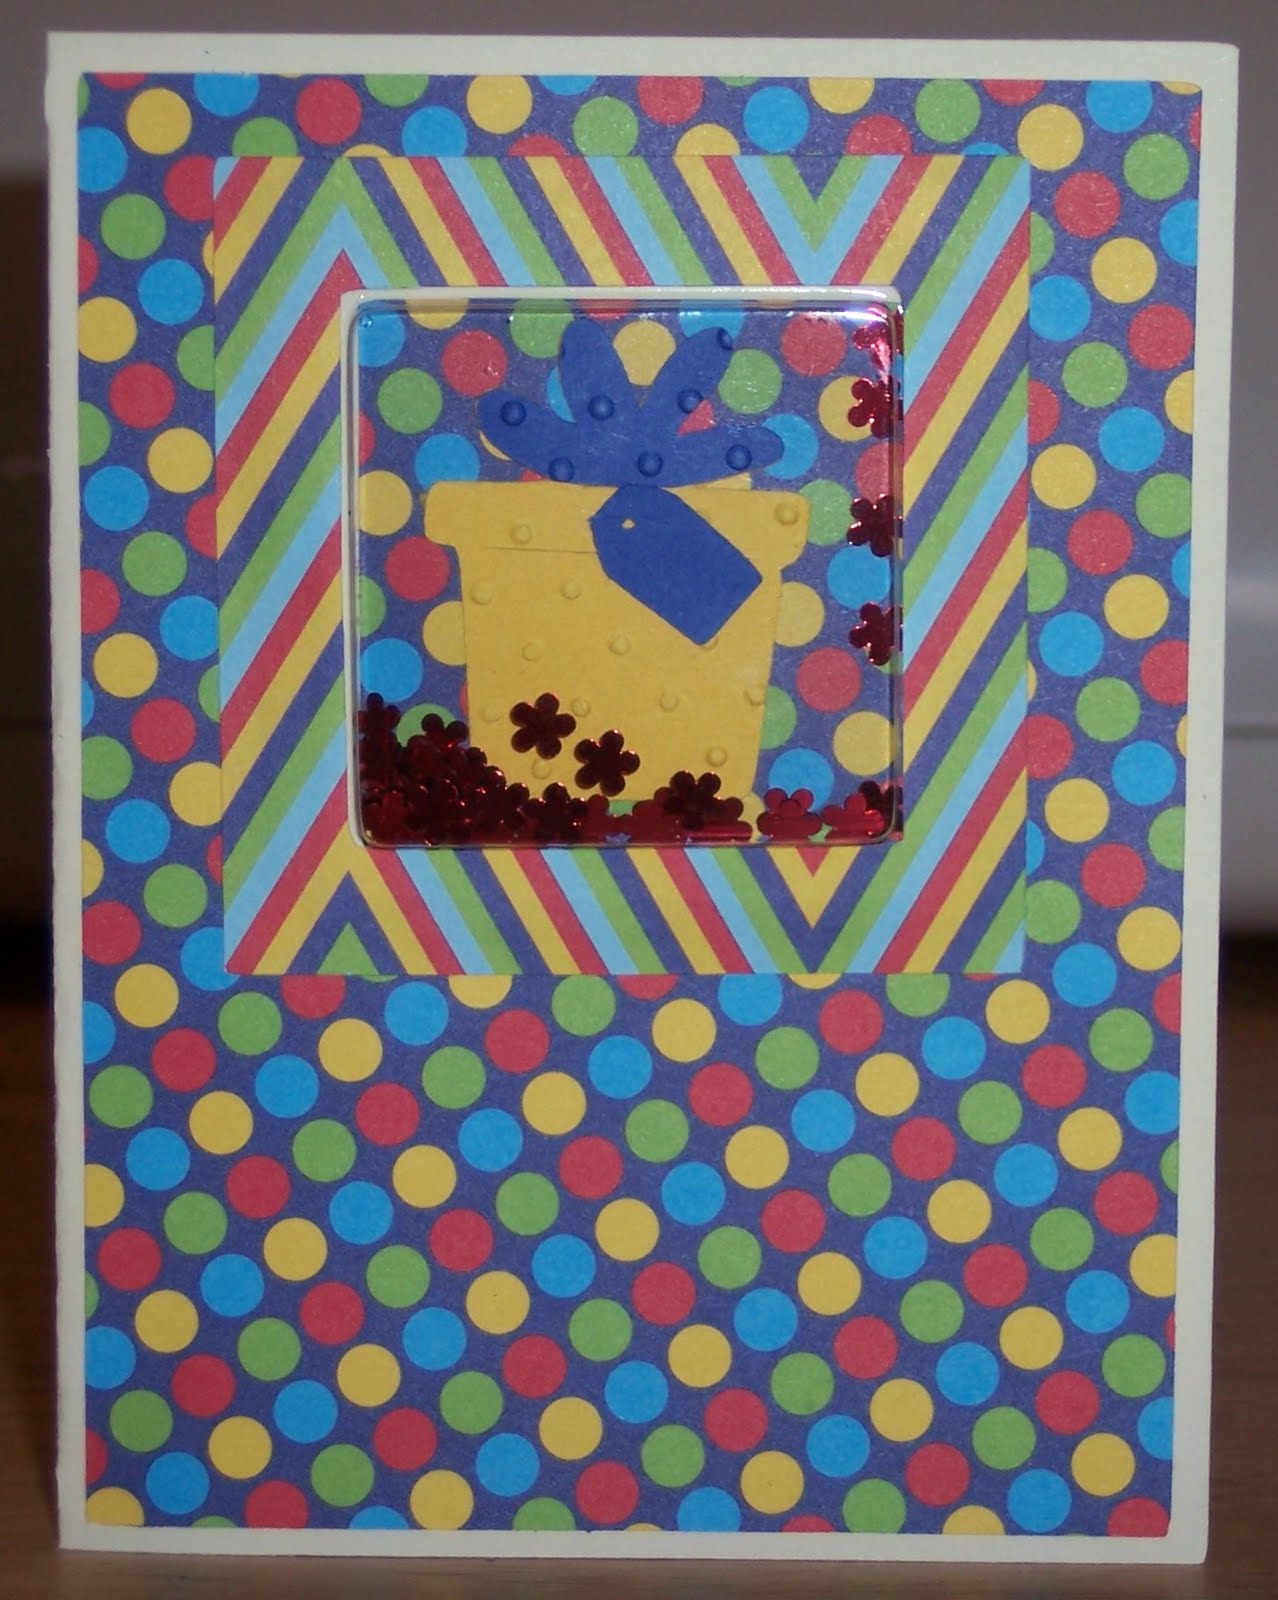
Thank you for visiting this past weekend during the Christmas in July Hop. Each day I created a different card, but I did not have the opportunity to explain how to make a shaker card from Day 3. I now have pictures and instructions to show you how I made this card.

First, you will need to purchase the Shake It card pouches. I bought mine at the local scrapbooking store. There are 10 in a package and they do come in various shapes and sizes. Here is the link to find out more...Impression-Obsession. 

Next, I used the Wild Card cartridge to cut my card base from a solid colored piece of cardstock at 4 3/4". I selected the "stitched card" on p. 35.  My small pouch fits perfectly. If you do not own the cartridge, you can make your own window with a square punch or you can purchase the overlays with the shaker pouches. 
Now, peal the sticker from the self-adhesive shaker window pouch and align over the cut-out square. Press on the edges around the window to make sure the two pieces are sticking together firmly.

Once the window pouch is set, you can add the front liner and frame. Be sure to save the square piece of paper from the liner. You will use this to seal in the glitter. I used the Wild Card cartridge to cut both these pieces at 4 3/4".  


You are ready to begin the next step.

  • First, you will need to find an image or digi  (approximately 1" in size) for your window. Be sure to adhere the picture well or the glitter will stick to the edges. I used Doodlecharms to cut a gift (p. 109) at 1 1/2".  
  •     Next, pour a small amount of glitter into the window as it is laying on a flat surface. I am using red shaped glitter that I purchased at Michaels on clearance for my window.
  • Then, adhere the square window piece to the inside left flap. I used a glue pen and carefully went around the edges of the square. It will align over the square nicely.
Here is what your card will look like from the front. 
To create the inside liner, choose you paper and cut it slightly smaller than the card base to create a framed look.
Decorate and add your message. : )
I still need to add my sentiment and a few more cuts, but now you have instructions on how to make a shaker card. I think any child will enjoy receiving one. It will be like magic trying to figure out how the glitter got on the inside since you can't see the small piece hidden behind the liner. Good luck making one!

Christmas in July Blog Hop Winner:
Mr. Random helped me pick the winner.


 Cheryl Gaffney said... 

I'd love to see a tutorial! I love making shaker cards but I haven't done one in a while.

TFS! Hugs, Cheryl
Be sure to come back tomorrow for the Die Cuttin' Diva's newest challenge. We have another great sponsor for this week. Oh, how I wish I could enter and win!

Stay Creative,
Georgiana

Saturday, June 18, 2011

Z-fold Pictorial, Pt. 2

Hello and thank you for coming back today.  I would like to say "Welcome" to my new crafty friends and thanks for completing the Cricut cartridge poll to the upper left. So far Kate's ABC is looking like a winner. If you haven't told me what you think, please share your opinion. There is time before the poll closes. 

It has been a satisfying Saturday with a birthday/pool party this morning and quiet time this afternoon. The boys went to Bass Pro (a definite man store) for goodies for their upcoming Boy Scout trip, which leaves my daughter and me at home.  :)

Therefore, I wanted to add Part 2 today since I have been working on a few more Z-fold cards.

Second

First


To begin with, you should have your base card that was created in part 1. Now you are ready to decorate. I cut my first solid piece of card stock the same size as my base, so my angle is aligned. If you are not making an angle on your Z-fold and you are keeping your top straight then you do not have to do this step.  I then cut my decorative piece of paper so the angle is the same. Score the lines the same as the base. Mine are: 3 1/4" and 6  3/4".

Next, I cut on the score lines vertically. You will need to trim one side of each piece and the bottom, so it is slightly smaller than the base. I like to see the various colors when layering. Also, you will want to save the bottom strips you trim off to decorate the envelope.

Before adhering any of the papers, try using an edge punch to create a topper. I have not used my punches very much, so this was a great chance to explore. I sure do like the look an edge punch adds and it is super quick and easy. You can change the topper for the theme or season as I did below.


Here is the card after adhering all the papers, but before adding my die cuts and embellishments.

I used Create a Critter for the shell (2"), sandcastle (3") and the crab (1 1/2") all located on page 40 of the booklet.

  I layered florals on these two card. On the left card, I added another piece to the front that slightly hangs over the edge and another for the sentiment on the back flap. The pink card is still a work in progress.
The possibilities are endless with a Z-fold card.

You still have time to enter the Playtime Paper challenge. You can even go look at the Design Team's creations to get a few more ideas.

What are you waiting for? Give one a try!

Happy Crafting,
Georgiana

Wednesday, June 15, 2011

Z-fold Pictorial, Pt. 1

Hello! I am glad you came back. I have a special post for today.
I thought I would make a pictorial to show you how to make a Z-fold card. Then I am hoping you will enter into the Paper Playtime challenge. 

I hope you are ready to give a Z-fold card a try!


First, choose the cardstock that you would like to use. I selected solid colors, but you can use any color/pattern you like. The height of the paper will be cut since the length of 11" is perfect. The height of my paper is 4 3/4".  
Next, using your paper trimmer you will cut off a triangle shaped piece of paper. I placed the top of my cardstock in the center of my blade and the bottom portion of my paper slightly to the left. 

My measurements:
Highest/Right side ~ 4 3/4"
Middle ~ 4 1/8"
Lowest/Left side ~ 3 3/4"   


Then, I scored my cardstock at 3 1/4" and 6 3/4". I had used a pencil and lightly drew a dot.  
 

Finally, you fold the cardstock to make a Z.
I used my left over strips to make smaller Z-fold cards. Those height measurements are: 3 1/4", 3 1/2", and 4 1/4". I scored the fold-lines the same as above.

Now you are ready to decorate!
I found the easiest way to get the angle of my paper to align with each section was to cut my decorative paper into 3 sections. Then I flipped the paper over and traced the top edge. I removed that top portion of the paper with my trimmer.

 Finally, I cut a small strip off the bottom of each section of decorative paper to get the exact size. If you want to layer the papers you would repeat the process, but cut more of the bottom (and side if needed).

Here is mine.
I haven't glued the decorative pieces since I am going to do more layering. You will repeat the process again on the back side or select which panels you want to decorate. Doubled-sided card stock may eliminate the need. 

I am still working on my Z-fold card and it will be posted in Part 2. I also have another feature that I will be adding. I was exploring with my edge punches and I really LIKE the look.

Also, I will have a Guest Crafter this Friday. Yeah! You will be happy with her homemade projects. If you are interested in being a Guest Crafter, please let me know!

Stay Creative,
Georgiana